Friday, May 28, 2010
My Own Path
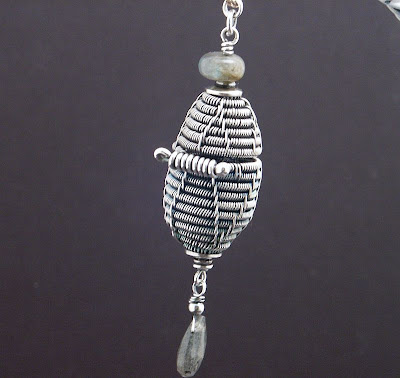
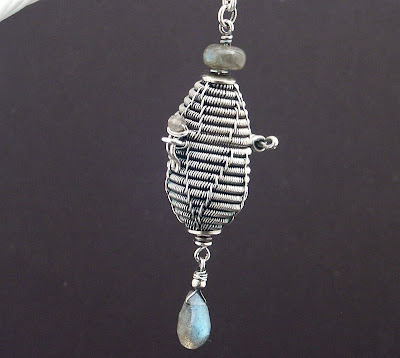
This last month I have been singularly focused on perfecting the construction and technique in the creation of the trinket boxes. As I have been working on them, a greater design vision has emerged. This necklace is my attempt to bring that greater vision to life.
This project has satisfied my soul in a unique and deep way. Merging my love of woven architectural structures along with a whole design point of view, and not leaving color neglected, is like eating a whole meal. Meat, veggies and dessert all in one. I am well fed.
I feel I have stumbled upon my own path here, and it feels so right!
The necklace is meant to be worn, either long, or doubled.
Wednesday, May 26, 2010
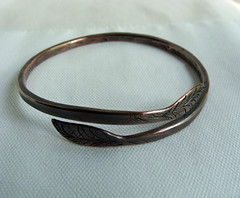
Leafy Copper Bangle
It's made of recycled copper wire that she often strips herself. She used a coating on the wire that gave it a pleasing shine and it feels good to hold and have next to the skin.
I wrote her and asked if she would divulge the secret of her coating with us. This was her response:
Not want to share?! I put a link to the product site in most of my listings 'cause I think it's the greatest discovery since copper! If people only knew!
www.everbritecoatings.com/copper_jewelry.htm takes you to Everbrite Coatings' promotional page for the product, which is called ProtectaClear. The fact that the stuff was developed for protecting construction metal made me confident in trying it, and it has really worked well. It comes as a spray or liquid; I've only tried the liquid, because I don't want to spray beads or stones and I only put it on finished pieces. It goes on like water -- no stirring -- and dries in a few minutes. I've tried dipping pieces, too.
I found and ordered ProtectaClear online last December, after I wore a bright copper cuff to Florida and brought it home a week later looking like a dark brown oil slick -- kinda cool, but not what I had in mind! I've been using it on all my copper ever since, whether the finish is bright or antiqued.
I'm doing my own test on the restored and treated bracelet: it's been sitting in the soap holder in my shower for a few weeks, getting soaped and sprayed with hot water a couple times a day. So far it looks perfect!
So that's the scoop! Oh, one more detail - I use denatured alcohol for the pre-cleaning, rather than Xylene; the instructions say use either.
Have fun!
Ruth
And I will tell you that with along with my bracelet, I recieved a gift-with-purchase! I got a weathered piece of recycled copper wire. The lady sure knows how to please! heehee
Monday, May 24, 2010
Spiral Locket Pictures
So, it was funny that I was laying in bed reading a book, (just two weeks ago) not even thinking about wire, and suddenly this idea for the pictures came to my mind. And than right behind that idea, came the idea for the trinket box.
Here is a picture of the new idea for holding in the photo's. I continued to do the same weave but added an inward facing loop into my weave. I squished the loop together and continued the weave. You could also not squish the loop together and have an attractive gap.
I haven't played with the idea fully, but anyone who wants to use it is welcome to it.
The one possible issue that I noticed from my test case, is that the loops tend to want to raise up just above the lip of the locket. This might cause the locket to not want to shut all the way.
Here is a picture of what I mean.
Possibly, flat nose pliers might be applied to shape the loops downward. Or, if I hadn't squished the loops together it might have wanted to lay flatter. I'm too excited about my trinket boxes to put any more development into this for now.
The only other thing I might suggest for the pictures, is that it would be nice if the photos were laminated. I think that would be super elegant, if you have the ability to do that.
Friday, May 21, 2010
I Pronouce Thee - Perfect!
Wednesday, May 19, 2010
Rewrapped Silver Trinket Box
But.. I now know why my first wrap didn't work. It turns out these spiral frames are asymmetrical. The box and lid don't quite sit flush to each other as they should. My picture doesn't quite show this fact, because I took the picture using the best angle;)
I should know better than to make that mistake, since I have written a whole blog post about spiral geometry.
http://theangstyartist.blogspot.com/2010/02/fine-point-of-spiral-geometry.html
Despite the fact that I have another flawed trinket box on my hands (some of you are probably rolling your eyes at me for saying that), I am thrilled with what I have accomplished so far. These boxes are not easy to make and I'm very pleased with myself:)
I know some friends of mind might like to purchase this box even in it's flawed condition, and some family members would also enjoy having it, so I won't trash this one.
I am hoping my perfectionist efforts here will move me forward into making some really beautiful things in the future. I have a lot of ideas I want to bring to these boxes and I want to build on a rock solid foundation. The drive for improvement can also be a stumbling block and a discouragement from creativity. The hard thing is having the wisdom to know when to listen to the criticism, and when to shut it down. Right now, I'm glad I listened.
Sunday, May 16, 2010
Practice, Practice, Practice
If you ever want to have a critique of your wire work, just take a picture using the macro function on your camera. The camera does not lie and will show you all you need to know in order to improve;)
I have made 3 of these time consuming boxes and only the copper one is actually good enough to sell. The silver vial will be trashed. The silver/amethyst one will be saved by a future reweave.
I absolutely love what I am working on right now with these boxes, but I'm kicking myself too and asking myself 'Why do I do this?" I don't have this kind of time in my life, Uggh!!! But this is what I want to make, and I believe I can make these with a fine craftsmanship, if I just practice, practice, practice... I am so conflicted....
Tuesday, May 11, 2010
Woven Silver Vial
I was disappointed with the design an hour before I completed it. I was certain the new hinge was keeping the woven spirals from sitting flush to each other, and I regretted attempting it in silver. The woven pattern seemed only to highlight the imperfections in my weave, rather than look ornate and sleek. The end caps hadn't been all I had envisioned either.
I left the project for an hour and came back and decided it wasn't SO bad. I see this project with two different sets of eyes, one pair who hates it for not being what it was meant to be, and another pair of eyes that finds it to still have some charm! hehe
Even though it didn't turn out to be all I had hoped, I feel certain this is the right path for me. I hope, over time, my skill improves enough for me to make what I have in my head.
As I was uploading the pictures to this blog post, I thought up an entirely new hinge design to try out. So... back to the drawing board, and back to the copper wire!
Saturday, May 8, 2010
Nut
This week I suddenly remembered where I was before I got lost. I remembered why I love wire. I remembered myself.
I knew that what I wanted to do would be time consuming and possibly frustrating, so I waited until Saturday before I even attempted it.
During the work week I have been trying to fit exercise into my life and take time to eat right and play. All those good things cut into the wire time during the work week.
I'm so happy with this project. Many past projects and efforts have brought me to the point where I could make this trinket today. I call this little guy Nut. He is just about the size of a Brazil Nut!
Or maybe he is a seed of of things to come for me? hehe
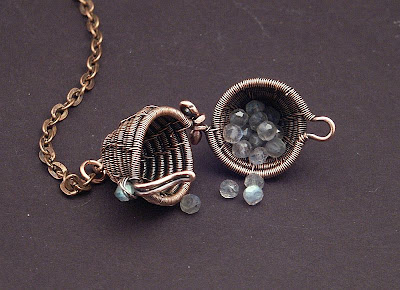
He is just big enough to hold some baby teeth, lock of hair, or string, or a ring, or pebble, or some tiny precious something!
Before I actually attempted this project I did an experimental prototype first. That way I can test out ideas, or catch potential errors, or use it for measurements when I do the real thing. Here is a picture of the prototype in case you're interested.